
The workspace
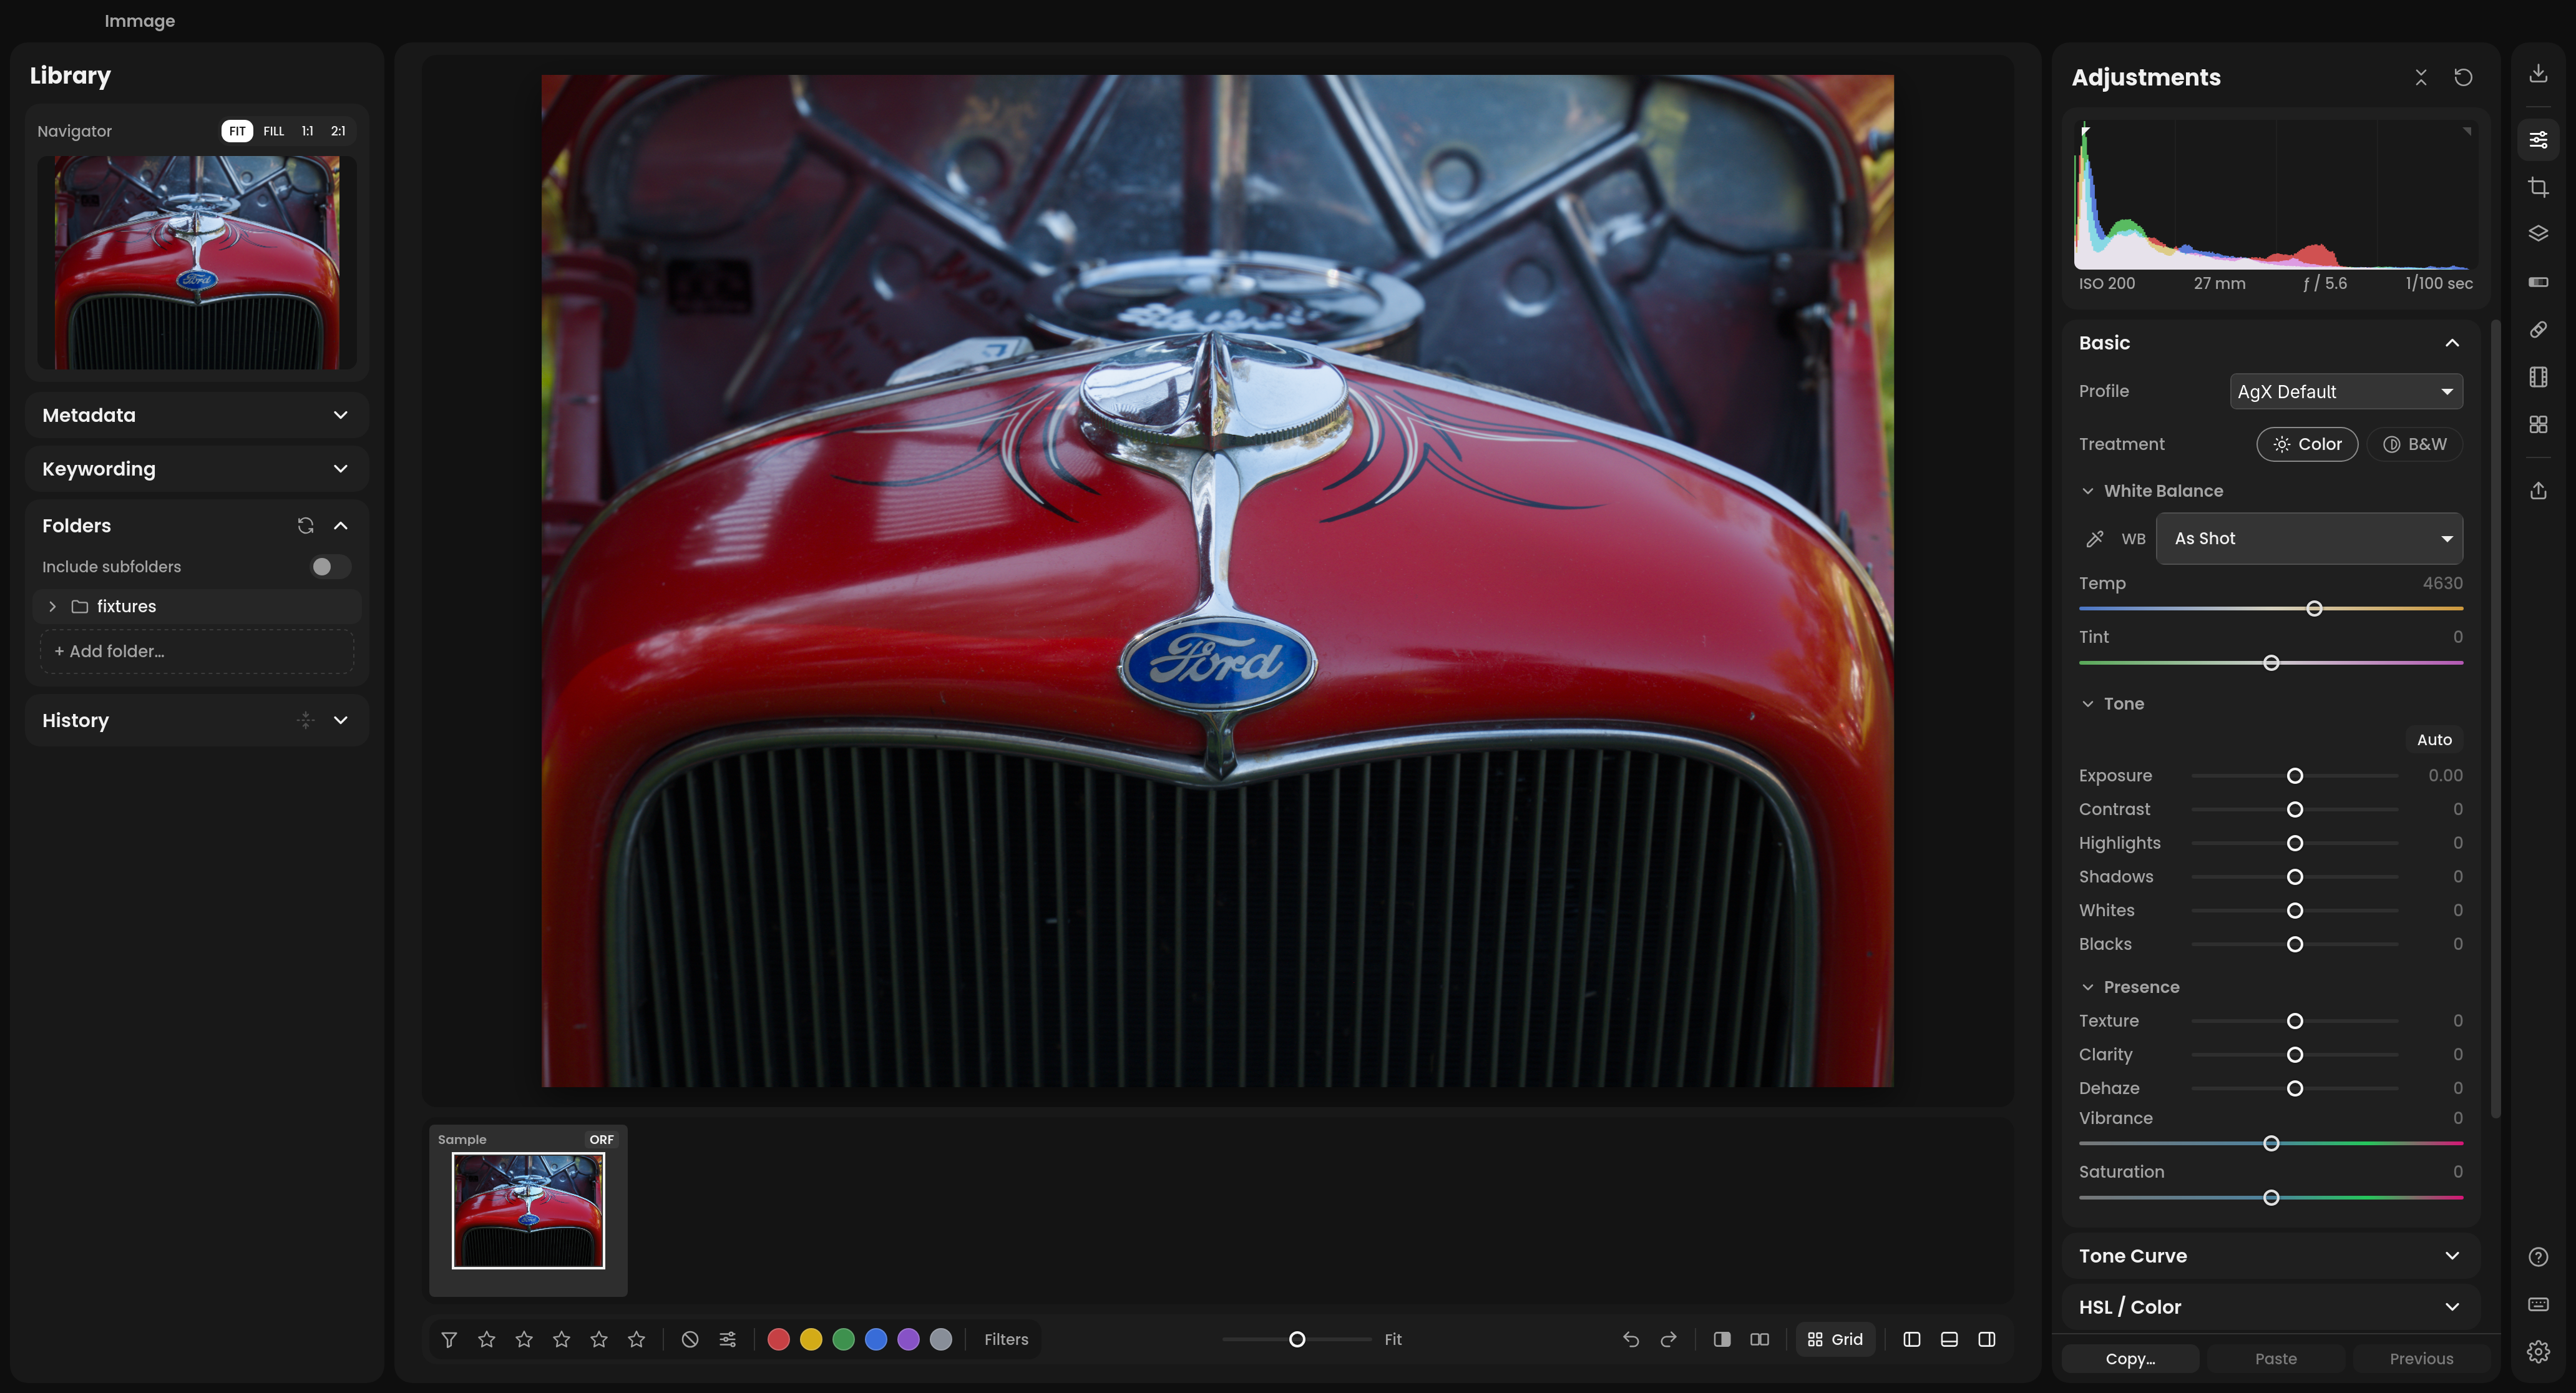
Immage keeps everything in one window: the Library panel on the left, the photo in the middle, the filmstrip below it, the editing panel on the right, and the rail down the right edge.
If you’ve used another editor: there are no separate library and develop modes. The filmstrip and grid browse a folder, and the right side always edits the open photo. The rail stands in for a module picker.
The rail
The narrow column on the far right lists the work in order: bring photos in, edit them, send them out.
| Button | What it opens |
|---|---|
| Import | the importer (⇧⌘I). See Import. |
| Adjustments | the develop panels. See Adjustments. |
| Crop | the crop tool (R); a second click applies it. See Crop. |
| Masks | local adjustments. See Masks. |
| Zone System | black and white tones as zones. See Zone System. |
| Heal | heal and clone (Q). See Heal and clone. |
| Presets | presets and film looks. See Presets and looks. |
| Export | the export dialog (⇧⌘E). See Export. |
| ? | the quick start guide |
| Keyboard | the keyboard shortcuts sheet (⌘/) |
| Gear | Preferences (⌘,) |
Clicking the button of the panel that is already showing slides the right panel shut. Crop, Masks, Zone System and Heal need a photo open.
On Windows, icon buttons use the standard arrow cursor across the whole button, including its icon. Hover highlights and tooltips identify the tool.
The Library panel
Down the left side, under the Navigator:
- Metadata: title, caption, rating, label and the camera’s settings
- Keywording: the photo’s keywords
- Folders: the folders you have added, as a tree
- Immich: search your Immich server, once it is set up
- History: every step of the edit
Click a card’s title to fold or unfold it. See Library and History, undo and copying settings.
Looking at the photo
Zoom
- Click the photo to zoom to 100% at that point; click again to fit.
- Scroll, or pinch, to zoom around the pointer, from fit up to 400%. The zoom pauses at 100% on the way.
- Z switches between fit and 100%.
- The Navigator has FIT, FILL, 1:1 and 2:1. When you are zoomed in it shows the visible part as a rectangle; drag it to pan.
- The zoom slider in the toolbar below the filmstrip zooms from a quarter of fit to 400%. Double-click it for fit or 100%.
- Drag the photo to pan.
Full screen preview: F shows the photo alone on the canvas color, black for Dark. F or Esc comes back.
Info over the photo: I cycles between the file name and capture date, the exposure and lens, and nothing.
Before and after
- \ shows the photo as it was before your edits, with a Before badge. Press it again to come back.
- Y, or the before / after button in the toolbar, steps through Side by side, Split left / right, Split top / bottom and Hold for before, then off. In the split views, drag the divider. With Hold for before, press and hold on the photo.
“Before” means the photo at its starting point, still with its crop and orientation.
Compare
C compares the open photo with another one, side by side. The left one is the photo you are editing; the right one is the candidate: a photo you have selected, or the next in the filmstrip. ← and → step the candidate, or click one in the filmstrip. The ⇄ button on its label swaps which one you edit. Esc leaves.
Histogram and scopes
The histogram sits at the top of the right panel.
- Drag sideways on it to move a Basic slider: from left to right the regions are Blacks, Shadows, Exposure, Highlights and Whites. Double-click a region to reset it.
- The triangles in its top corners light up when shadows or highlights clip. Hover one to see the clipped areas on the photo; click to keep them showing. J shows both.
- Under it, a line gives the shot’s ISO, focal length, aperture and shutter speed.
- The scope button in its corner switches to Waveform, RGB Parade, Vectorscope or Waveform + Vectorscope, with options for scale, channels and orientation. The vectorscope can show color harmonies (Complementary, Triad and others); drag on it to turn the guides.
The color under the pointer
While Tone Curve, HSL / Color or B&W Mix is open, hover over the photo:
- Tone Curve shows the pixel’s red, green and blue values and marks where it sits on the curve.
- HSL / Color and B&W Mix show its color band, and the sliders for that band glow.
Arranging the panels
- Tab hides the side panels; ⇧Tab hides the filmstrip too. Press it again to bring them back.
- Drag a panel’s inner edge to make it wider or narrower.
- Auto-hide panels (Preferences › General) slides the panels away when the pointer leaves them, and back when it rests a moment at the window edge or the rail; the filmstrip comes back at the very bottom, below the toolbar. The pin in a panel’s head keeps it open.
- Focus mode (on by default) means opening one panel or card closes the others; ⌥-click opens one alongside. With it off, ⌥-click opens one alone.
- Canvas (Preferences › General) sets what is behind the photo, in full screen too: Dark, Neutral Gray, which judges tones without a dark surround, or White, which shows the photo as on a print. L steps through them.
The toolbar under the filmstrip also has buttons to show or hide the Library panel, the filmstrip and the Adjustments panel.
Undo and redo
⌘Z undoes any edit and ⇧⌘Z redoes it. The undo and redo buttons also sit in the toolbar under the filmstrip. See History, undo and copying settings.
Checking interface regressions
The optional visible-app GUI suite exercises a separate copy of a photo in an isolated test app. Its new control cases cover slider keyboard/typed input, undo/redo, crop, graphs, masks, settings and module choices; these additions await live verification. The coverage ledger tracks earlier fixes and remaining controls. Reports and app screenshots stay local. Screenshots are diagnostic until reviewed; a passing selection does not certify every module or platform. Follow local approval instructions before each GUI run.
GUI verification checks memory before starting the test app: it requires at least 4 GiB available RAM and swap usage no higher than 50%. If resources are insufficient, it saves a blocked report instead of launching. This does not protect against all memory growth during a run; it never closes your other apps to free memory automatically.
Interrupted tests retain incremental evidence and memory readings for diagnosis. An incomplete run is never treated as a pass. Optional screenshot comparison uses explicitly reviewed local references for the same environment; no baseline is accepted automatically. See the suite guide for offline inspection commands.
This page is part of immage's own docs, at v0.41.1. View the source on GitHub.